
簡単なiPhone向け3Dゲームを作ろう
iPhone向けの3Dゲーム制作の練習シリーズです。
アンリアルエンジンでiPhone向けの3Dゲーム制作方法をまとめていきます。
細かな数値設定などの説明をしない場合もありますので、ご参考程度で確認ください。
※作業環境:UEバージョン5.5.1 Macbook Pro 2019年モデル iPhone11
私の使用したMacの性能だと、作業中の処理落ち、遅延が頻繁に発生しました。
もし同じような端末を使用する場合は、細目に保存することをお勧めします。
リスポーン設定
今回は、プレイヤーが床から落ちた時に、スタート位置にリスポーンするようにしていきます。
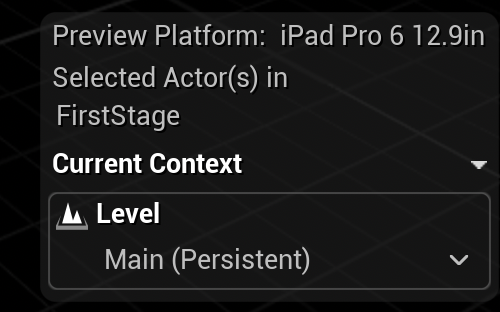
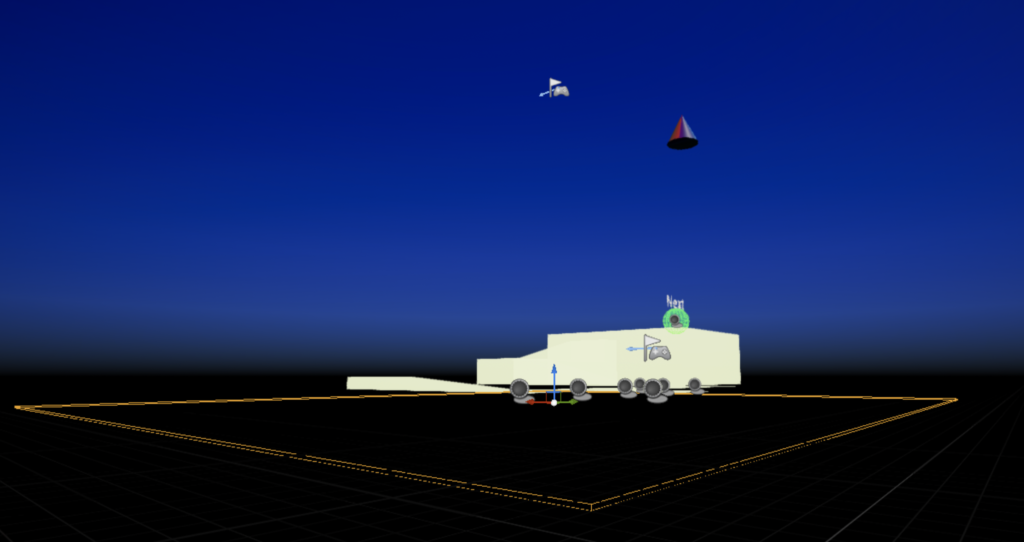
場外エリアを設定する
レベルを「Main (Persistent)」に切り替えます。
「六角形+」マークをクリックし、「Volumes」の「Kill ZVolume」をレベルへ、ドラック&ドロップします。
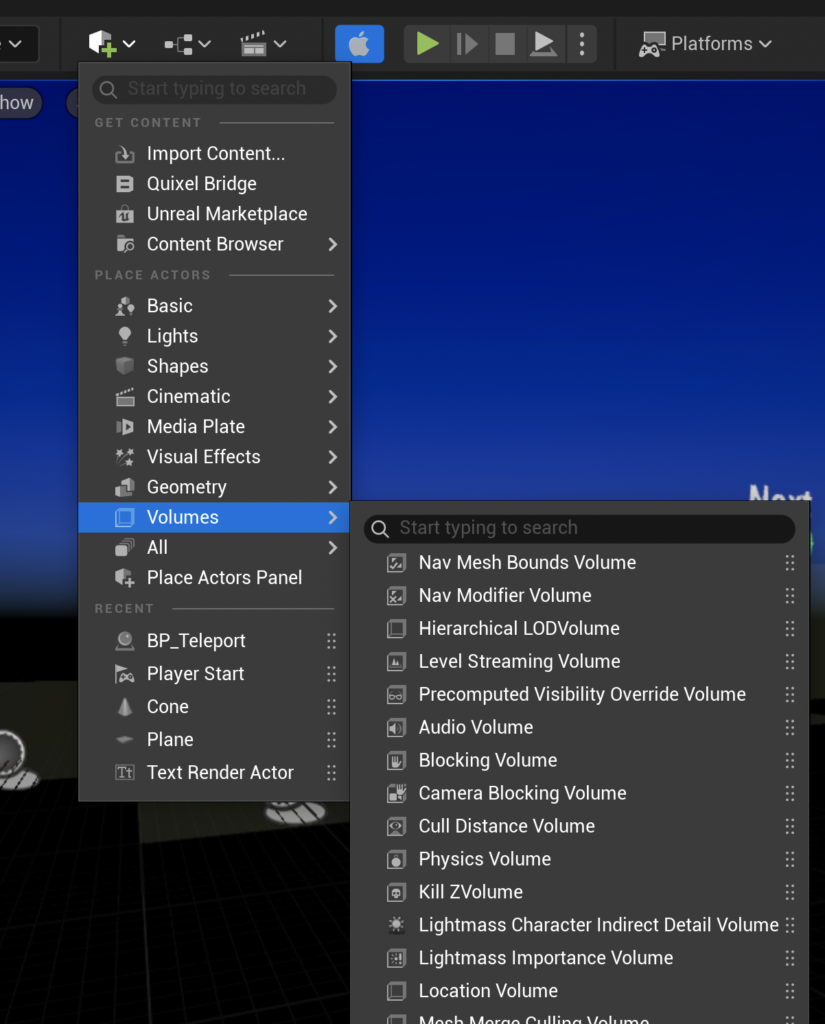
Kill ZVolumeは、特定のエリアにプレイヤーやアクタが侵入したときに、それらを削除できるものです。
「Kill ZVolume」の大きさを調整します。
リスポーン位置を設定する
プレイヤーをリスポーンし再スタートする位置を設定していきます。
「BP_ThirdPersonGameMode」を開きます。
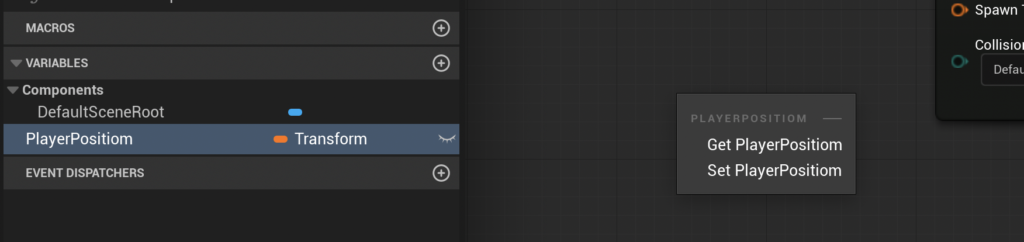
「VARIABLES」の横の「+」をクリックし、新しい変数を作成します。

変数名は「PlayerPositiom」にし、型は「Transform」にします。
「PlayerPositiom」綴り間違えました。
本当は「PlayerPosition」にしたかったですがこのまま進めます。
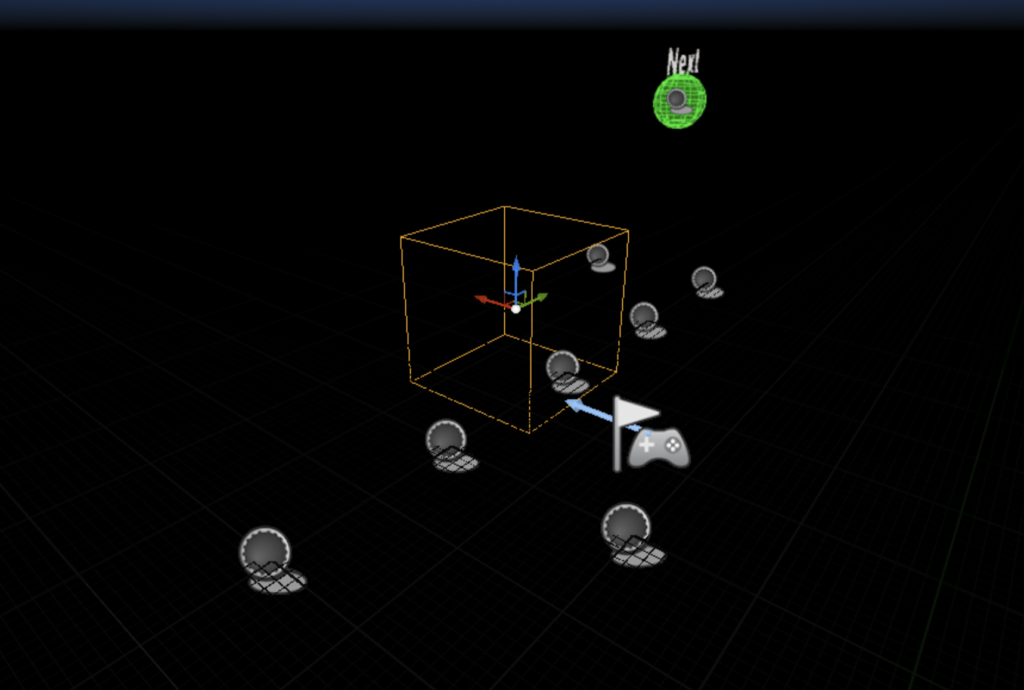
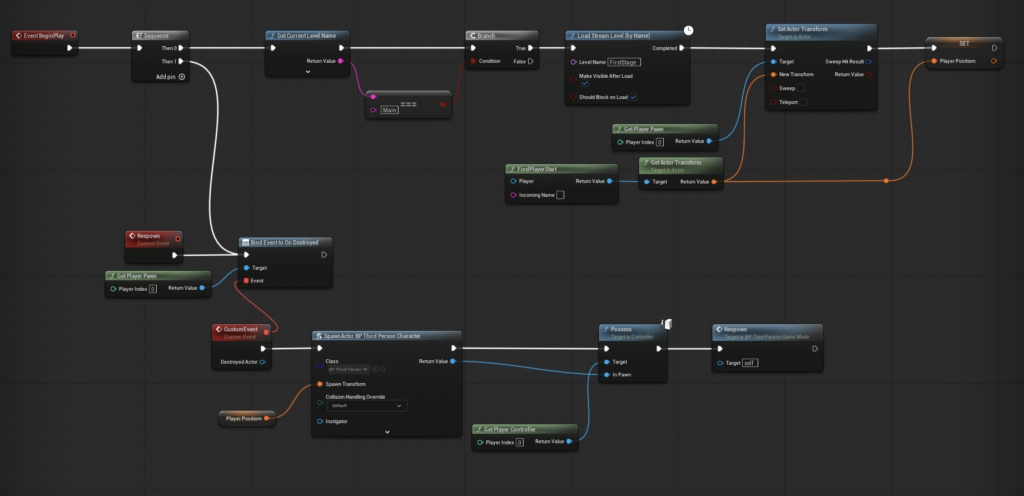
以前作成した下の写真のような処理に、新しい処理を追加していきます。

「Set Actor Transform」ノードの近くに、先ほど作成した「PlayerPositiom」をドラック&ドロップします。

「Set PlayerPositiom」を選択してノードを配置します。
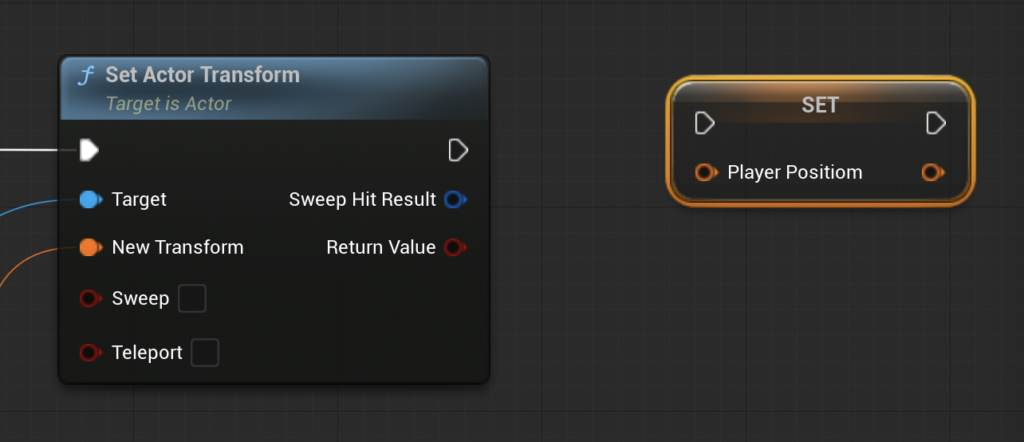
「Get Actor Transform」ノードと「Set Player Positiom」ノードを繋げます。

プレイヤーが範囲外に出たときの処理を追加する
プレイヤーが場外に落ちたときのリスポーン処理を作成していきます。
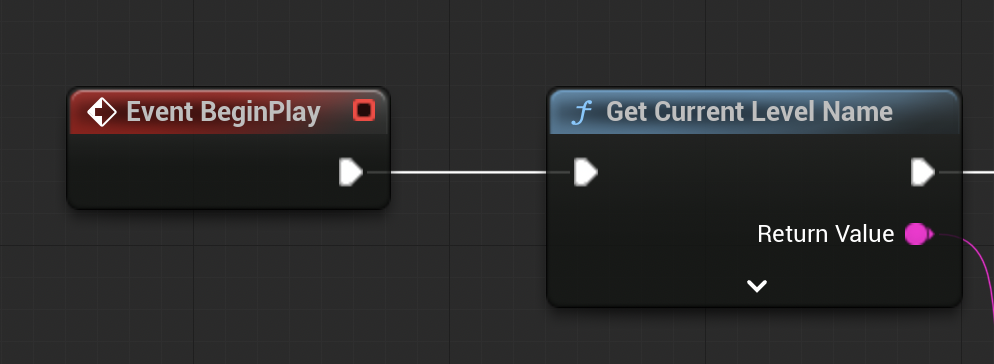
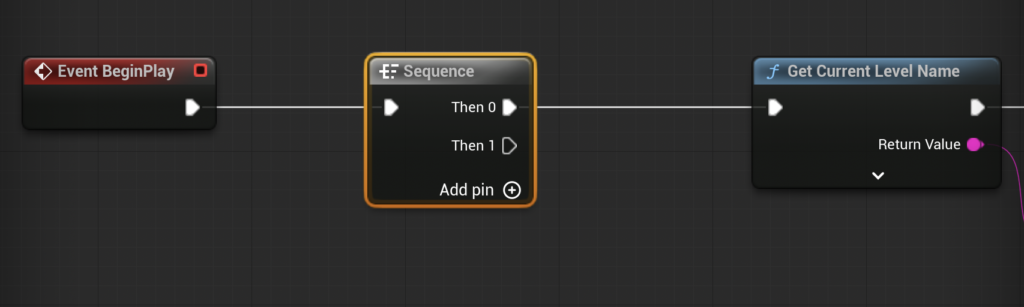
「Event BeginPlay」ノードと「Get Current Level Name」ノードの間にノードを追加します。
「Sequence」ノードを追加します。

こんな感じになります。
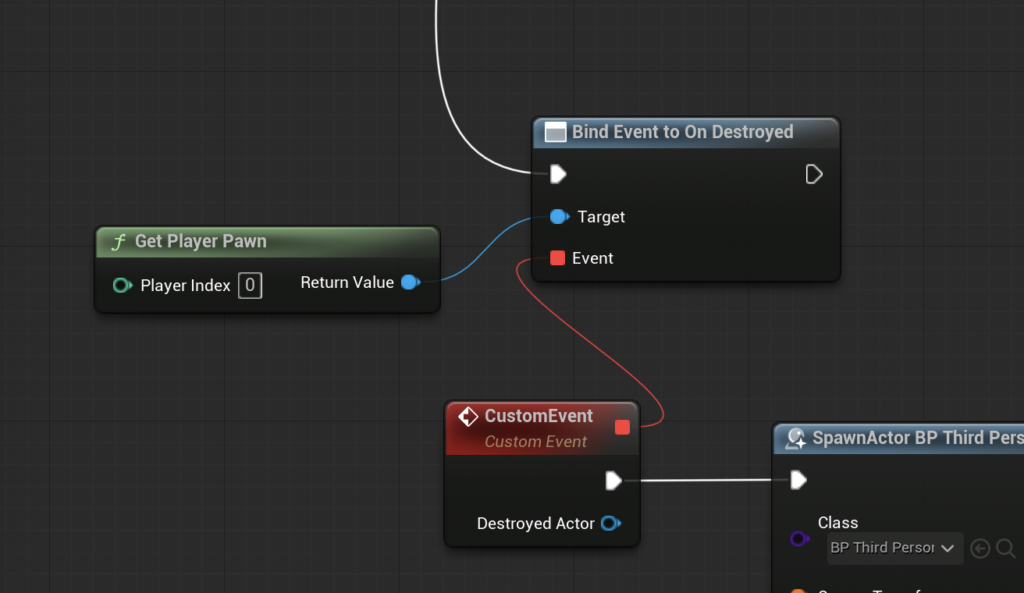
「Sequence」ノードの「Then 1」から「Bind Event to On Destroyed」ノードを呼び出します。
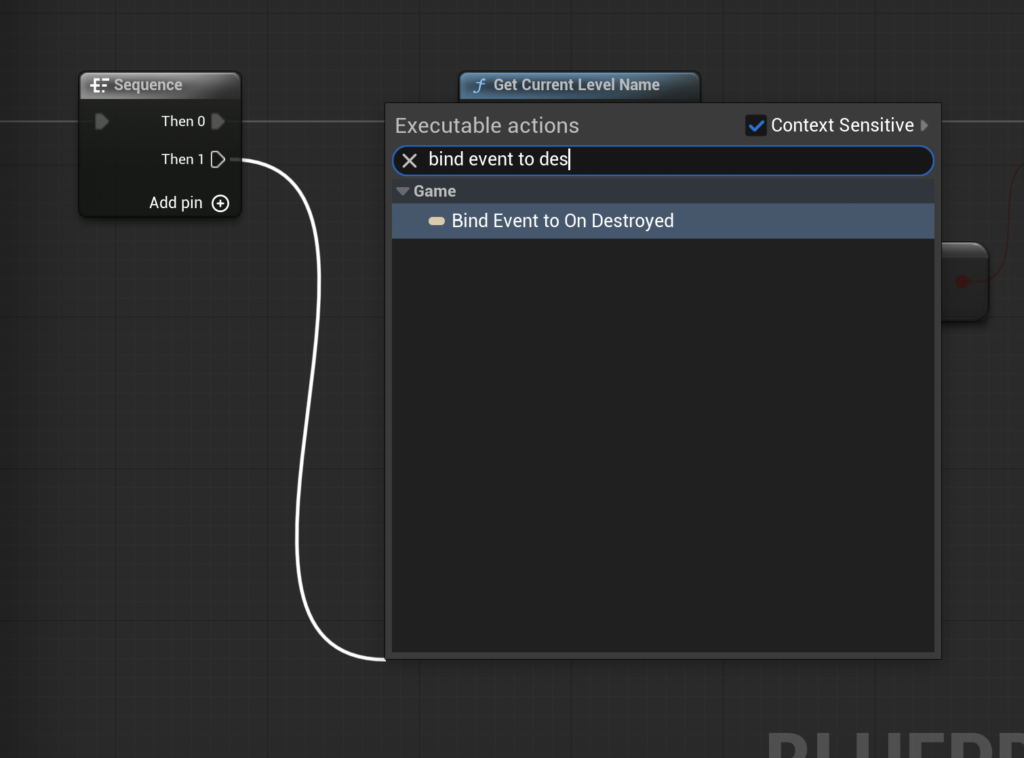
「Bind Event to On Destroyed」ノードを配置しました。
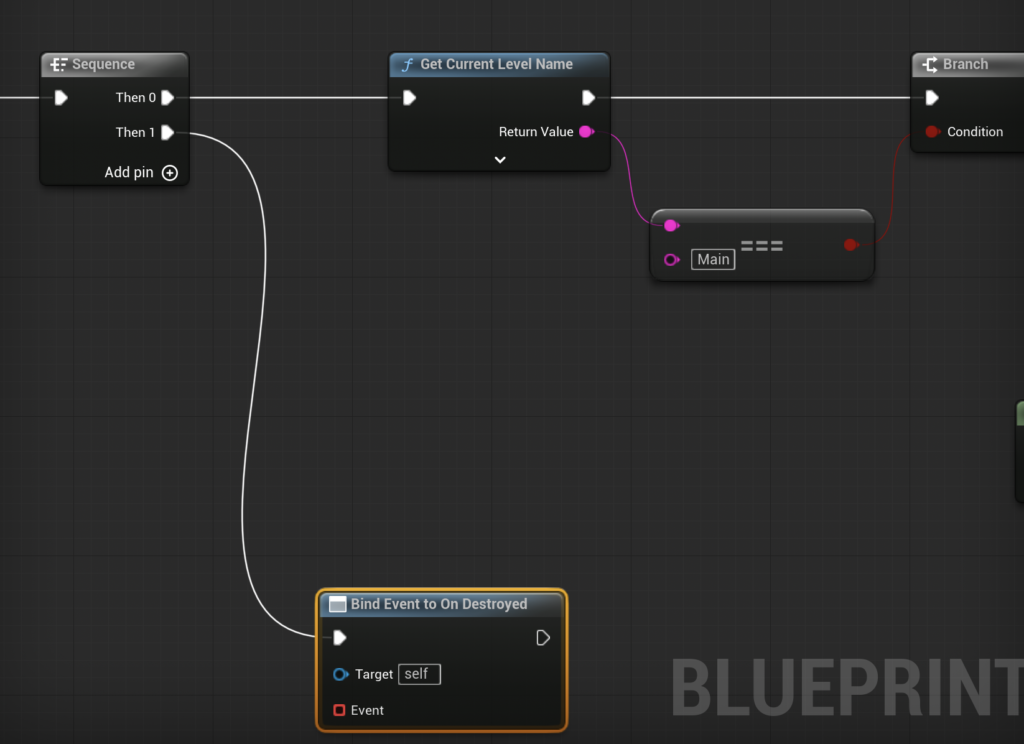
「Bind Event to On Destroyed」ノードは、プレイヤーが削除されたときに発生させるイベントを設定します。
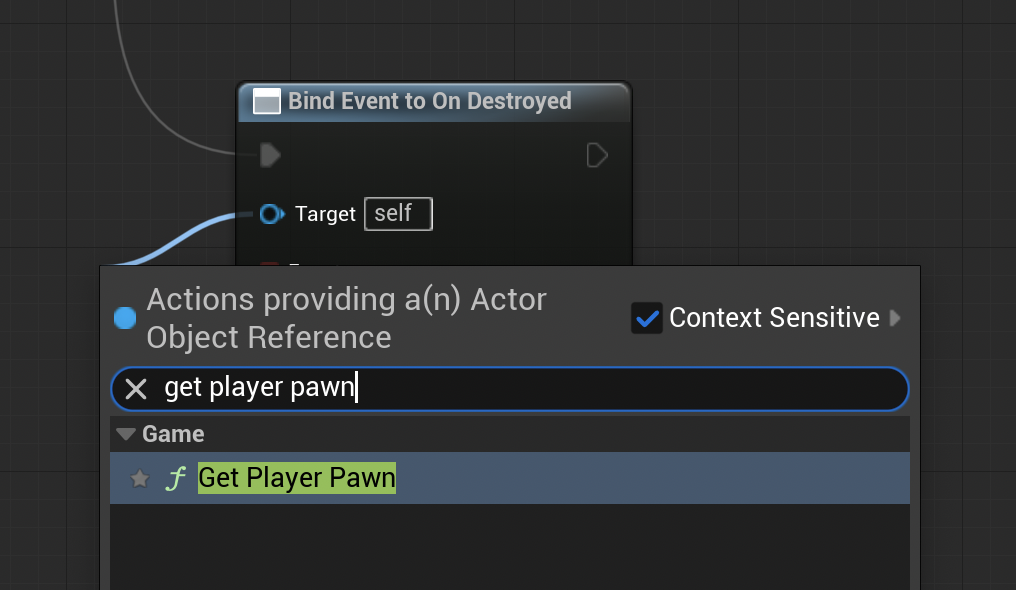
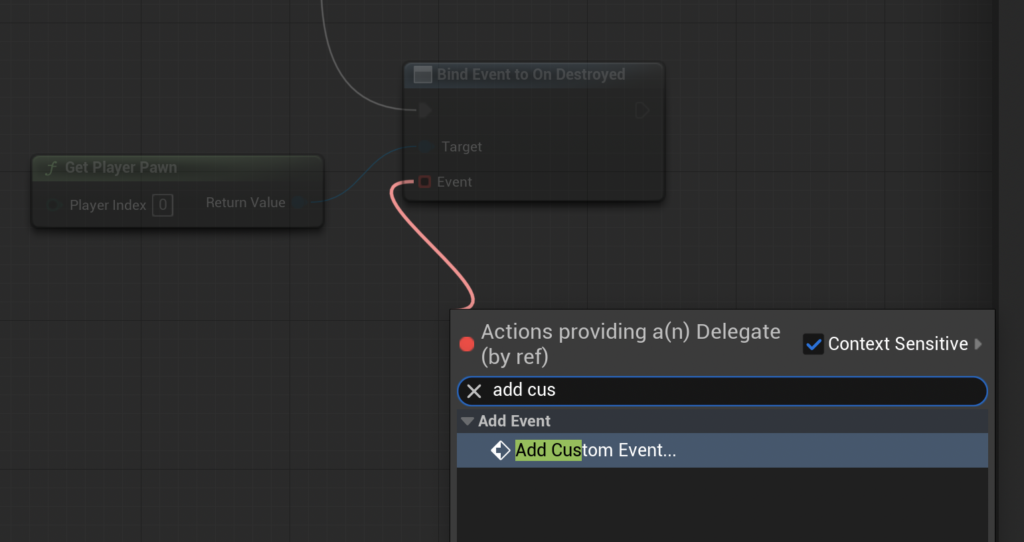
「Bind Event to On Destroyed」ノードの「Target」から「Get Player Pawn」ノードを呼び出します。
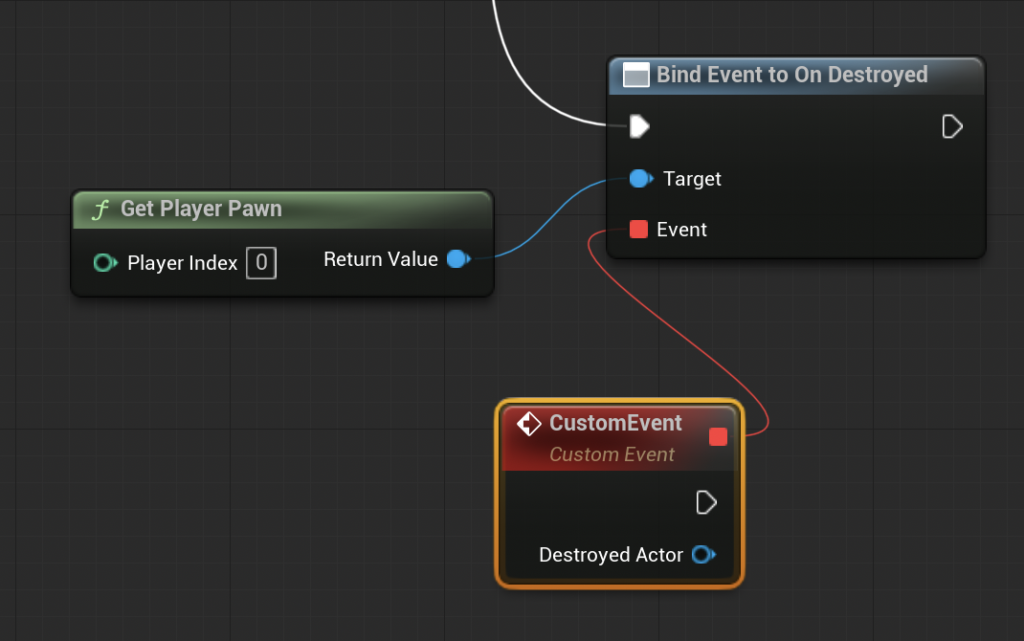
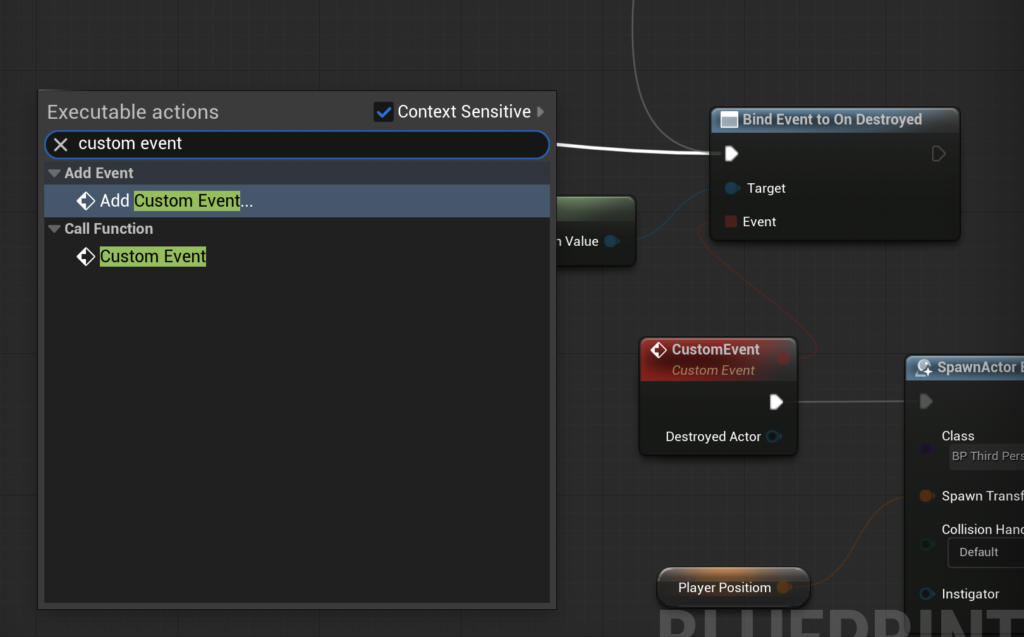
「Bind Event to On Destroyed」ノードの「Event」からノード検索で「Add Custom Event…」を選択します。
これで「Get Player Pawn」ノードと「CustomEvent」ノードを配置できました。
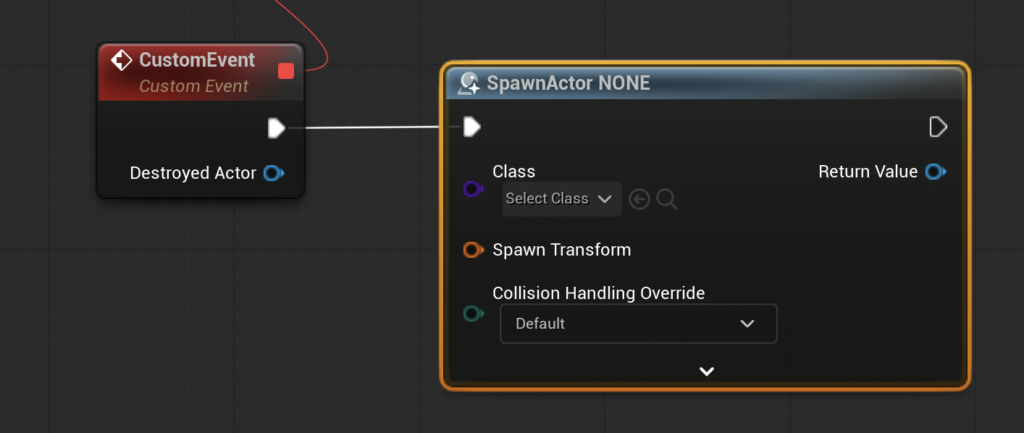
次に「CustomEvent」に処理を追加していきます。
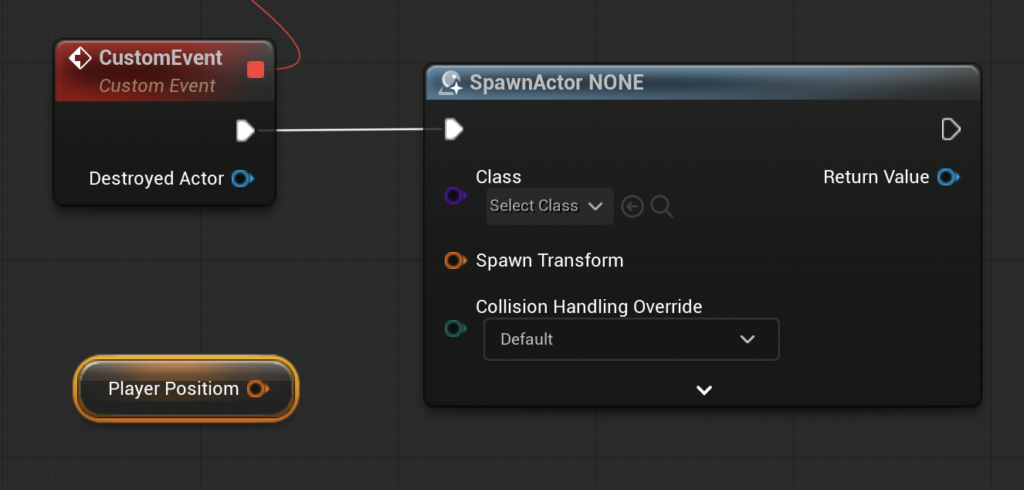
「CustomEvent」ノードから「Spawn Actor from Class」ノードを呼び出します。

「Spawn Actor from Class」ノードが配置できました。
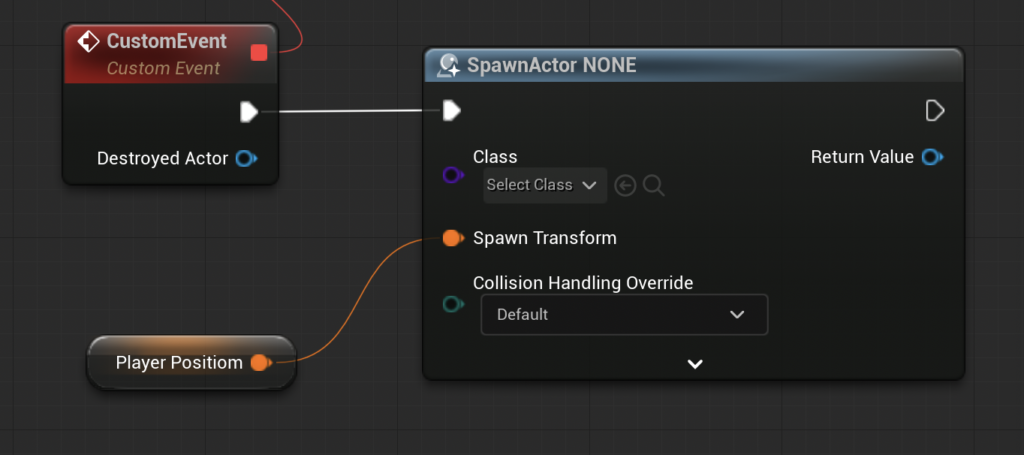
「PlayerPositiom」変数をドラック&ドロップします
「Get PlayerPositiom」を選択して「PlayerPositiom」の「Get」ノードを配置します。
「PlayerPositiom」ノードと「Spawn Transform」を繋げます。
「Class」の設定を「BP_ThirdPersonCharacter」にします。
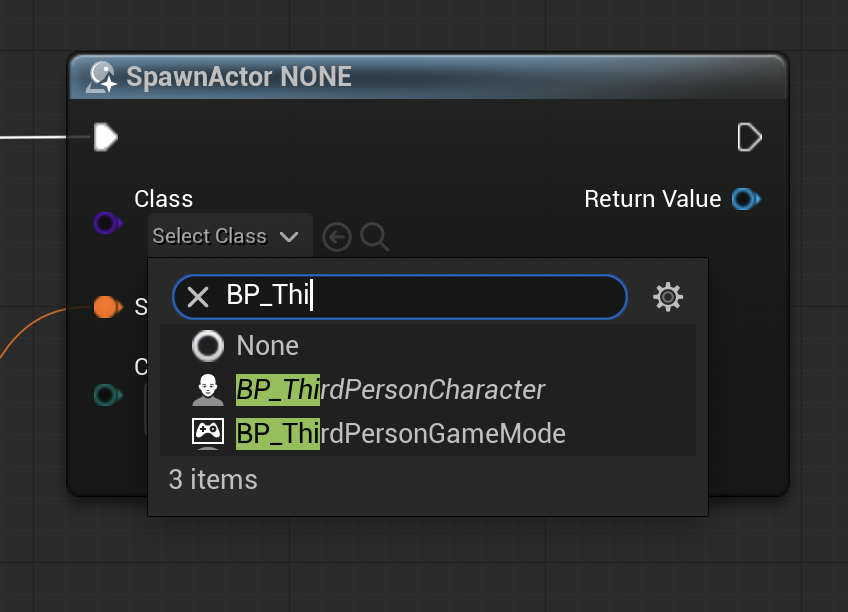
「Class」を設定するとノード名が「SpawnActor BP_Third Person Character」に変更されます。
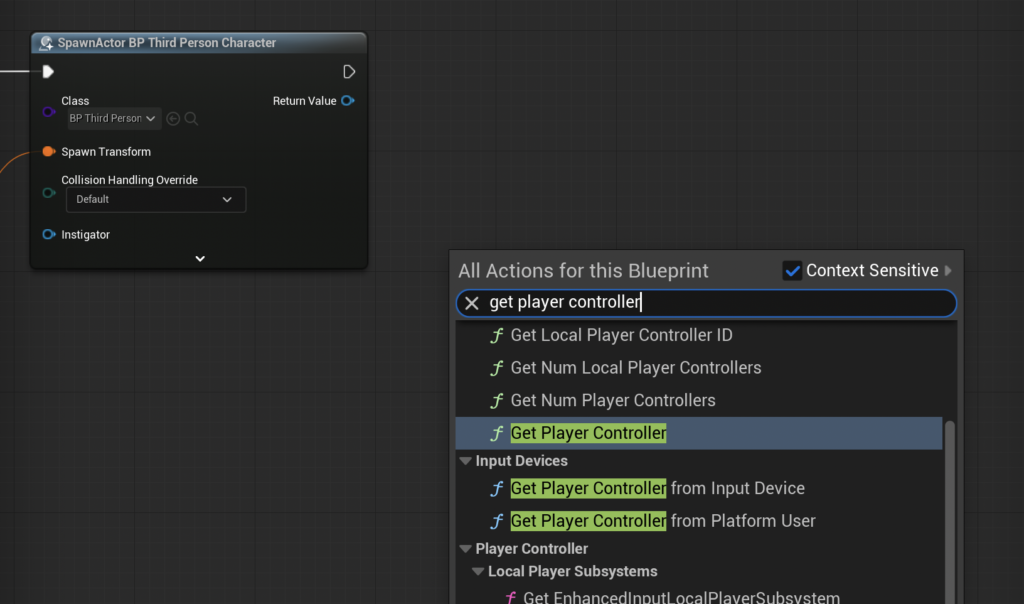
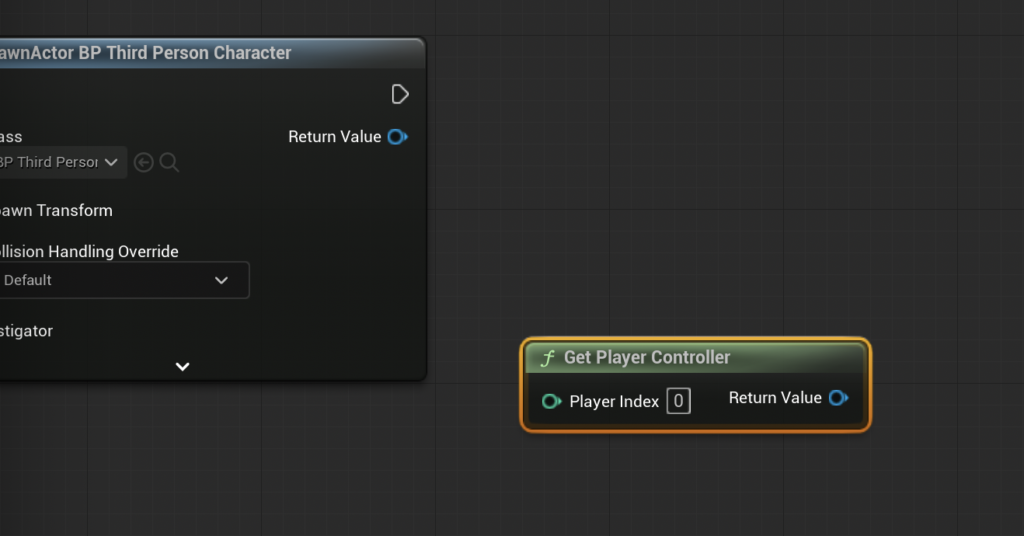
「Get Player Controller」ノードを適当な位置で呼び出します。
こんな感じです。
「Get Player Controller」ノードから「Possess」ノードを呼び出します。
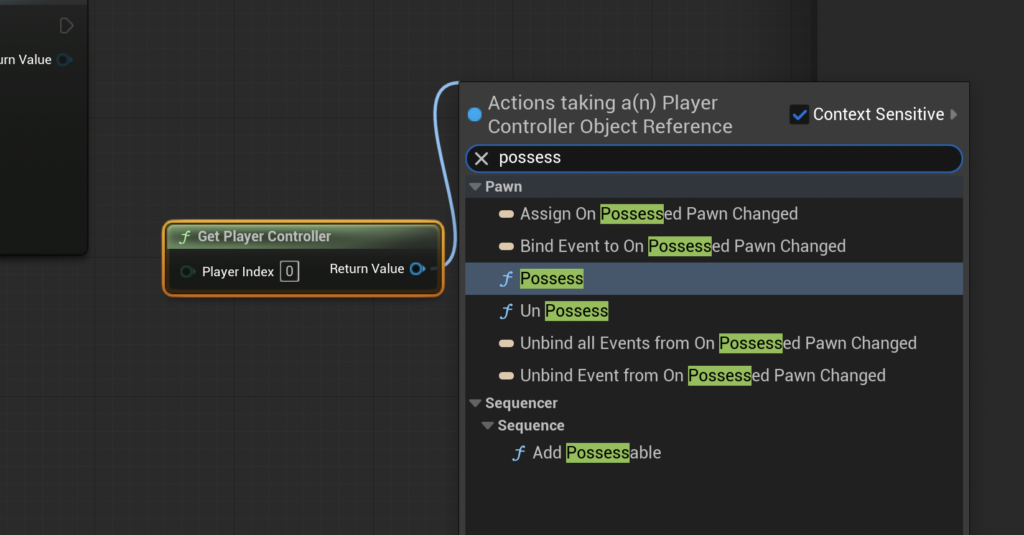
「Possess」ノードが配置できました。
「SpawnActor BP_Third Person Character」ノードと「Possess」ノードを繋げます。
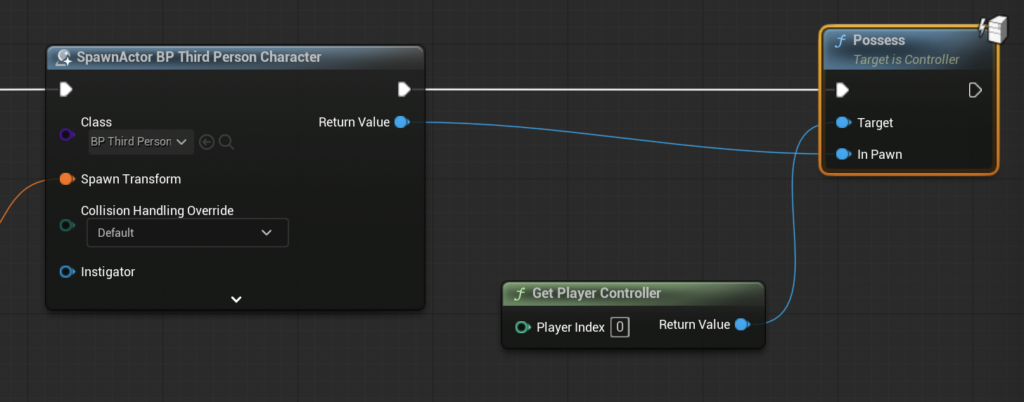
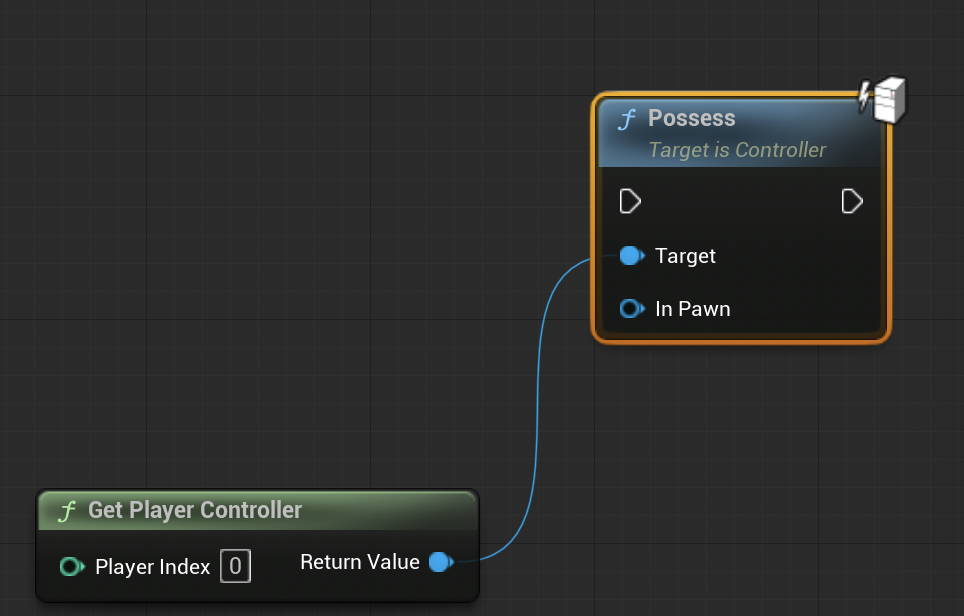
「Retuen Value」と「In Pawn」を繋げることを忘れないようにしてください。
「Bind Event to On Destroyed」ノードのある場所に戻ります。
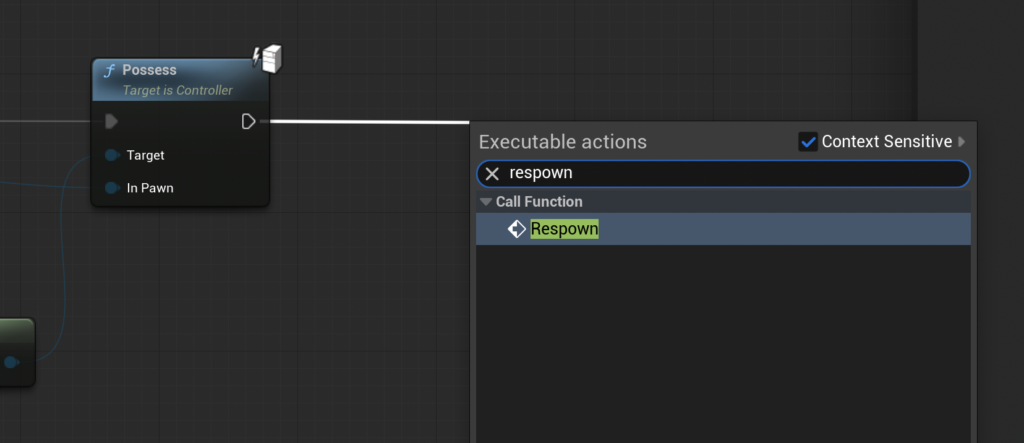
「Bind Event to On Destroyed」ノードから、ノード検索で「Add Custom Event…」を選択します。
配置されたノード名を「Respown」に変更します。

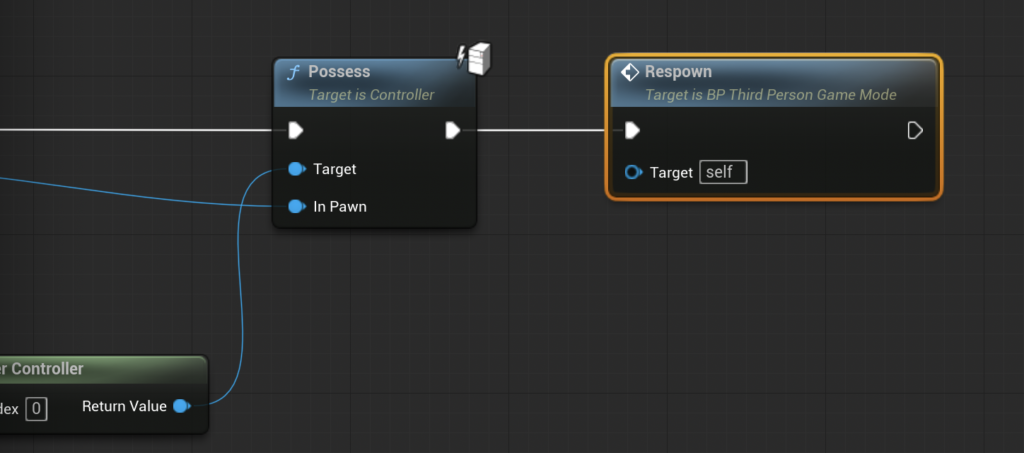
「Possess」ノードの場所に戻ります。

「Possess」ノードから「Respown」ノードを呼び出します。
こんな感じになります。
これでリスポーン処理が出来ました。
ノード処理全体はこんな感じです。
2つ目のステージのリスポーン位置を設定する
1つ目のステージのリスポーン位置設定は出来たので、次は2つ目のステージに移ったときにリスポーン位置の更新を行っていきます。
「BP_Teleport」を開きます。
「Event Graph」の画面を表示します。

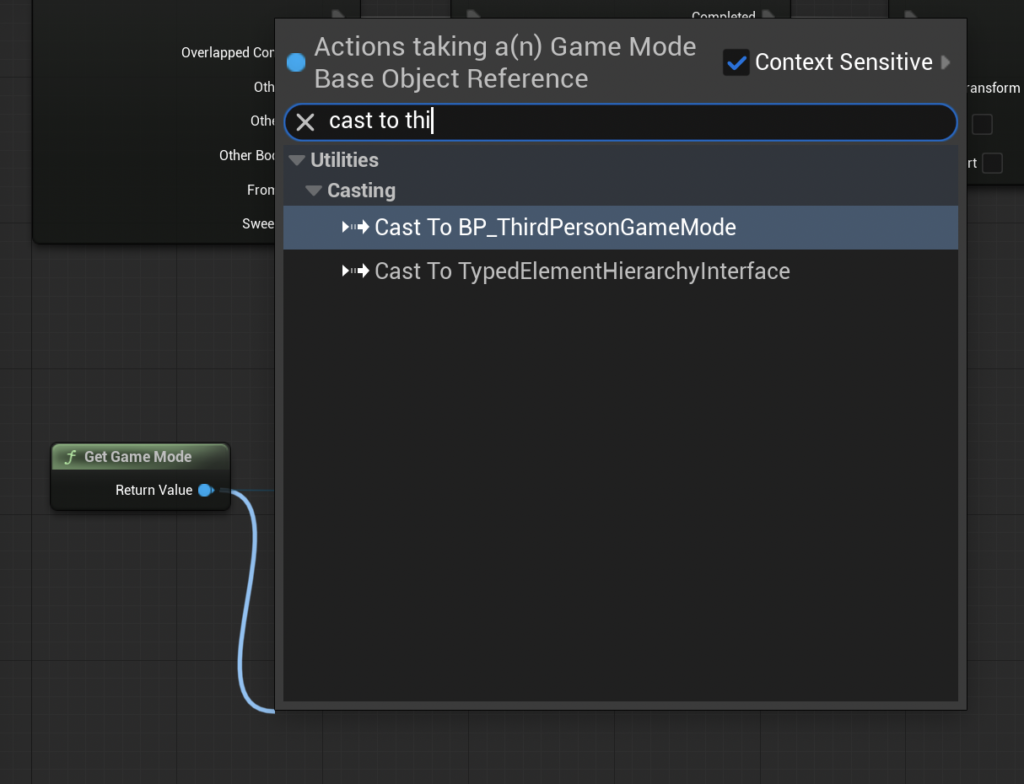
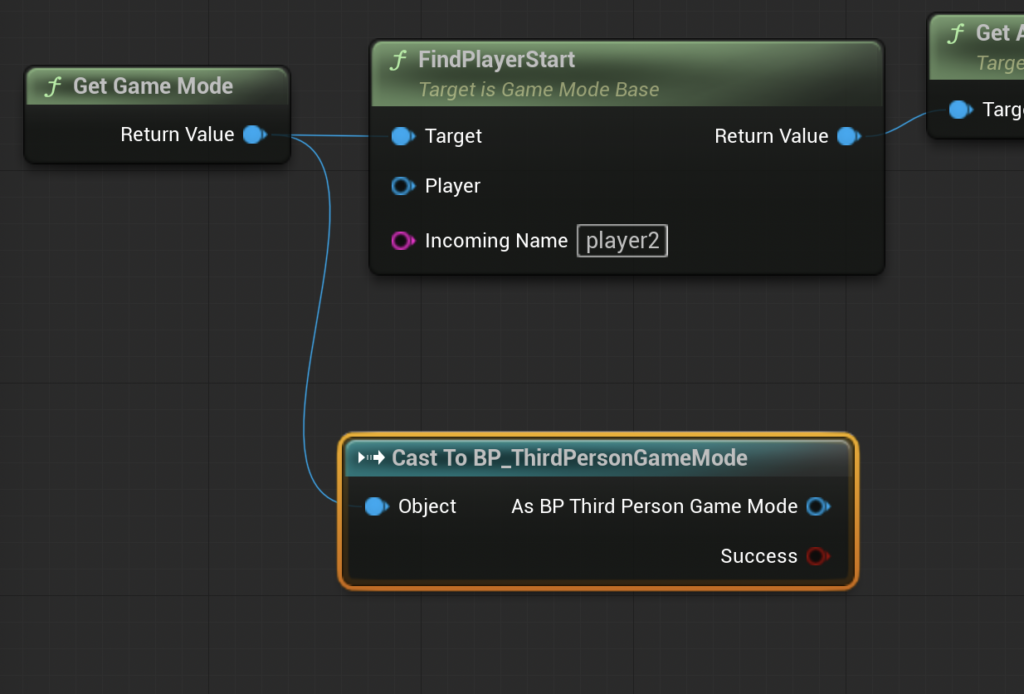
「On Component Begin Overlap」ノードの近くにある「Get Game Mode」ノードを見つけます。
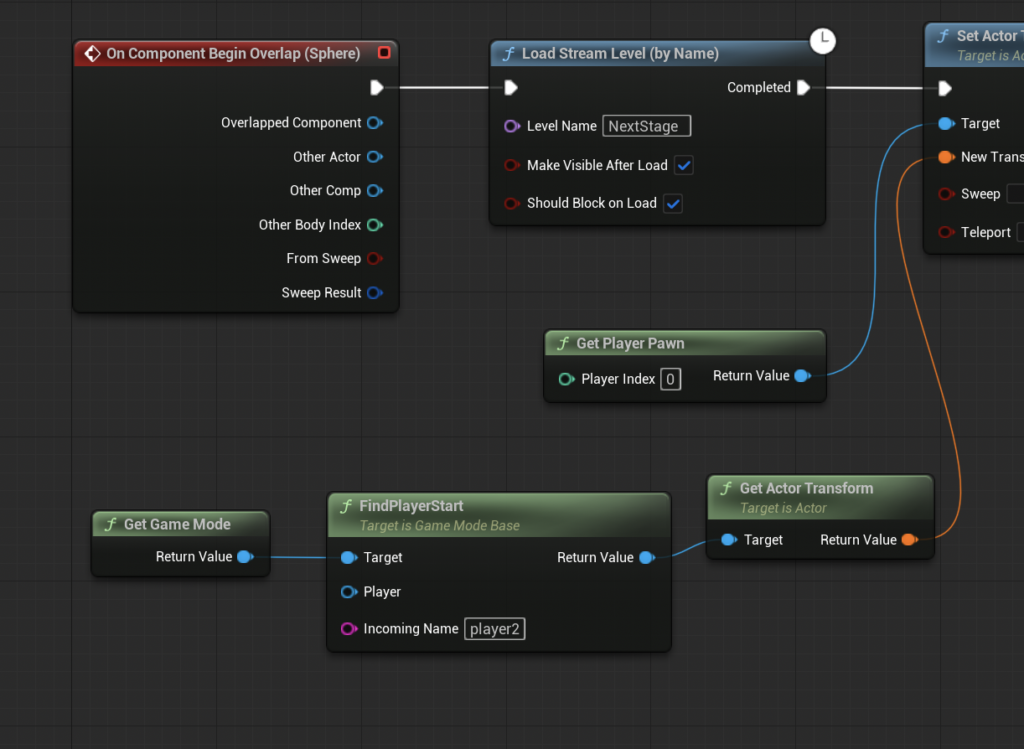
「Get Game Mode」ノードから「Cast To BP_ThirdPersonGameMode」ノードを呼び出します。
こんな感じになります。

「Cast To BP_ThirdPersonGameMode」ノードを右クリックし、「Convert to pure cast」を選択します。
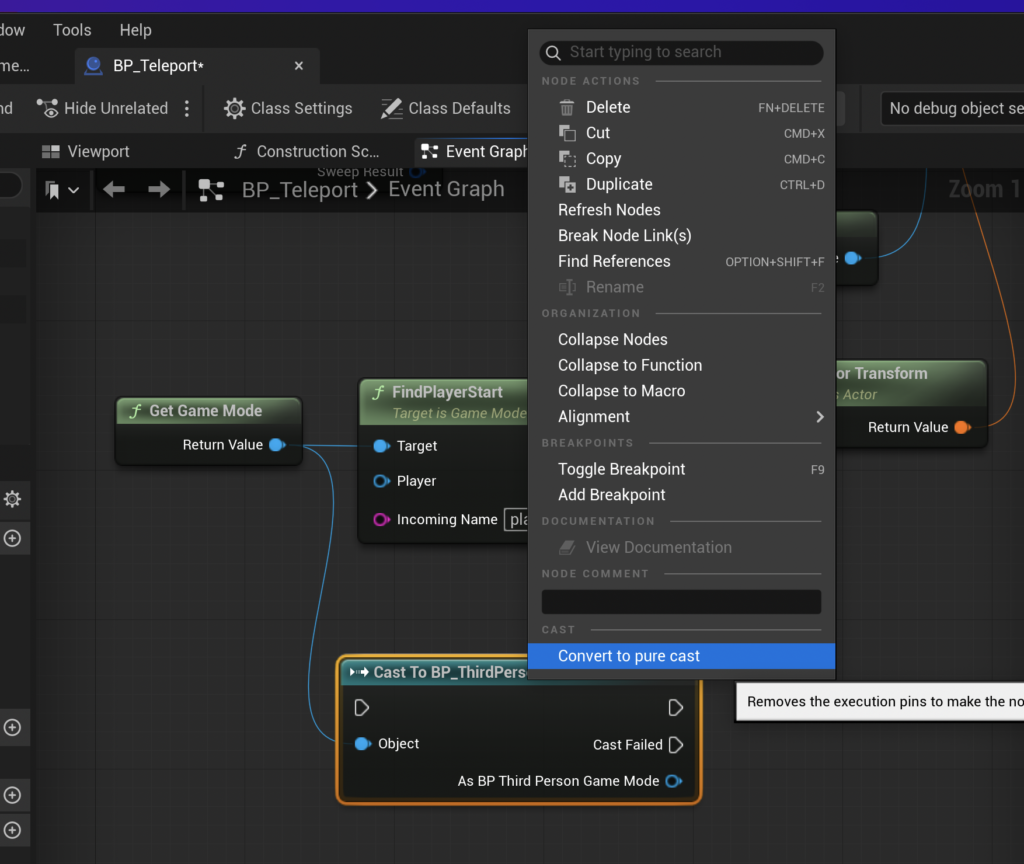
実行ピンが無くなった状態のノードに変化します。
「Cast To BP_ThirdPersonGameMode」ノードから「Set Player Positiom」ノードを呼び出します。

こんな感じになります。
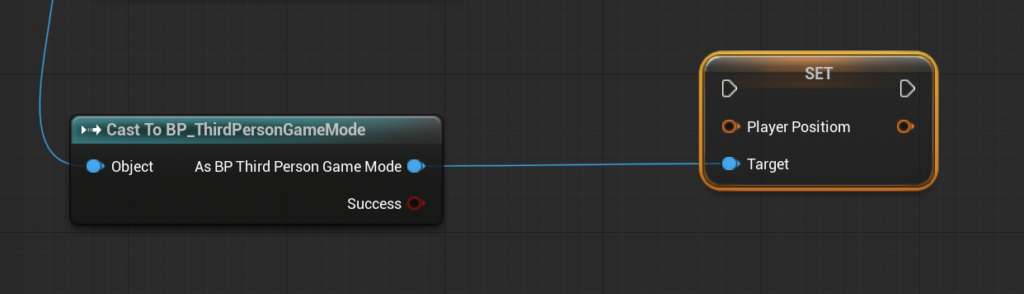
「Set Player Positiom」ノードを「Set Actor Transform」ノードの先に配置し繋げます。
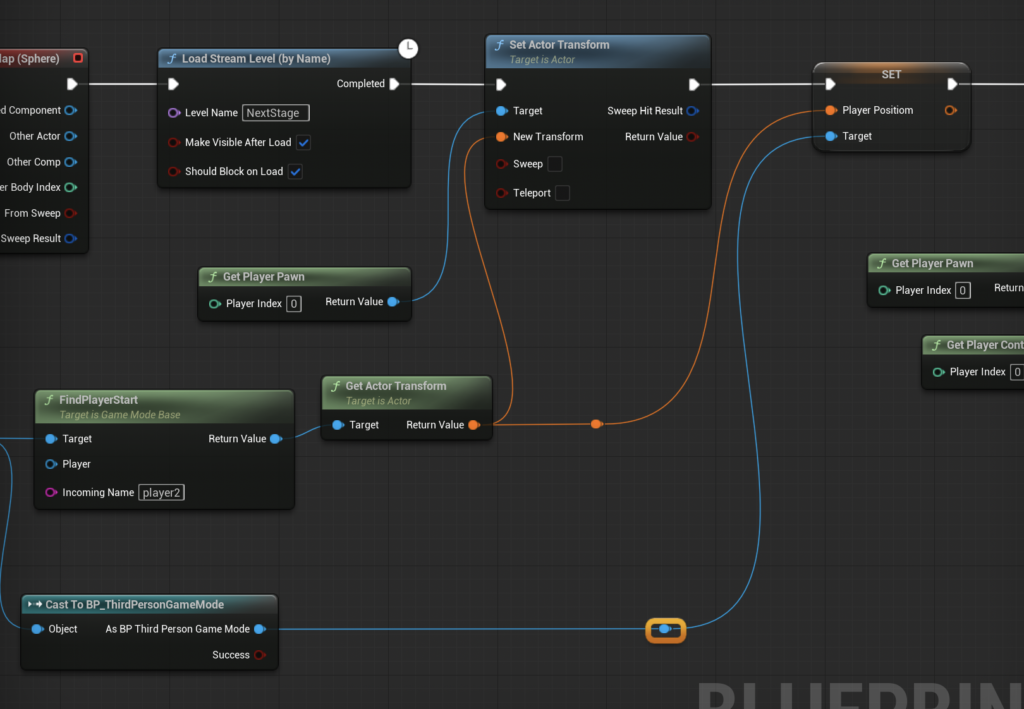
これで、2つ目のステージに移ったときにリスポーン位置も更新されます。
リスポーン設定完了
今回はここまでです。
次回は「ゴールを作成する」の予定です。
前後記事
他の記事を探す
他の記事も気になる方は、以下の記事の目次を確認ください。
